
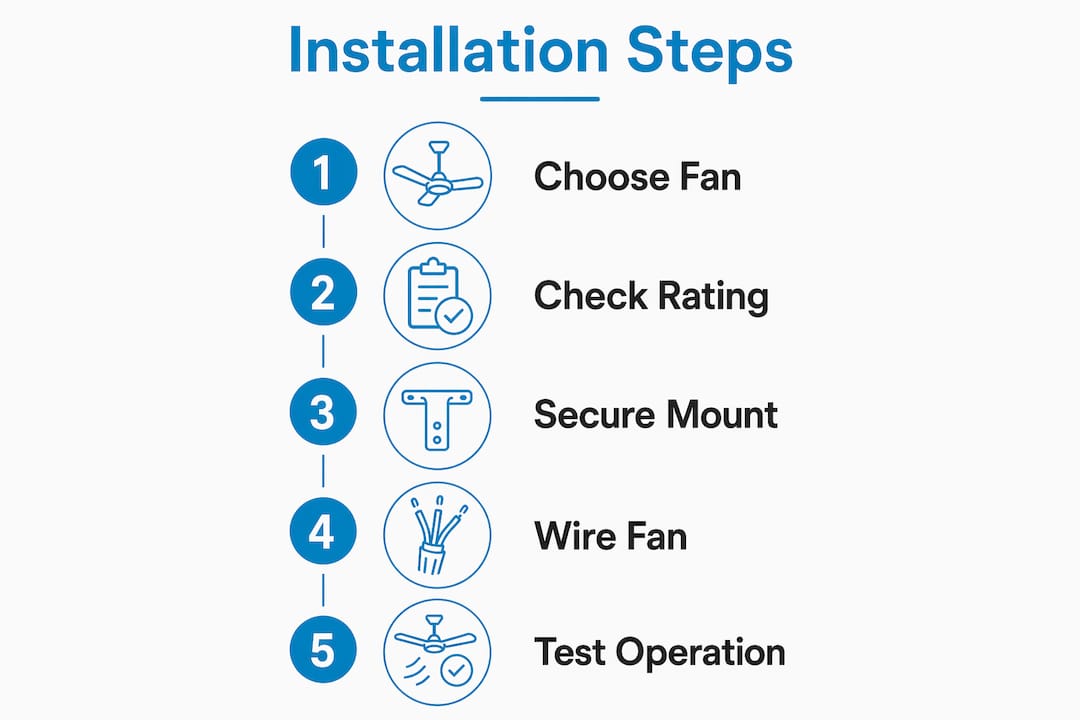
Ceiling fan outdoor porch installation is the process of securely mounting and wiring a weather-rated ceiling fan on your porch to deliver cooling, improve air circulation, and hold up against outdoor elements year-round. Unlike indoor fans, outdoor models carry specific UL ratings, either damp-rated or wet-rated, that determine where they can safely operate. Done correctly, a porch fan setup also deters insects, reduces perceived humidity, and adds real aesthetic value to your outdoor living space. This guide walks you through every step, from choosing the right fan to final balancing, so you get a quiet, durable result the first time.
What type of outdoor ceiling fan should you choose for your porch?
The right fan for your porch depends on one factor above all others: how much exposure to moisture the location gets. Damp-rated fans are built for covered areas where rain does not hit directly, such as screened porches, covered patios, and soffited decks. Wet-rated fans are fully weather-sealed and handle direct rain, making them the correct choice for open pergolas, exposed decks, and uncovered patios. Using the wrong rating is not just a performance issue. Damp and wet ratings are not interchangeable, and the wrong choice leads to rapid motor failure and genuine safety hazards.
Beyond the moisture rating, blade span determines how well the fan actually cools your space. A 29-inch fan suits spaces under 75 square feet, while 50 to 54-inch fans cover between 226 and 400 square feet. Most standard covered porches fall in the 150 to 300 square foot range, which puts a 44 to 52-inch fan in the sweet spot. Oversizing a fan wastes energy and creates uncomfortable drafts. Undersizing it means the fan runs at full speed constantly without delivering real comfort.

Material durability matters just as much as the rating label. Look for blades made from ABS plastic, treated wood composites, or aluminum, since solid wood warps outdoors even on covered porches. Motor housings should be powder-coated or made from rust-resistant materials. For coastal homes or high-humidity climates, a coastal-grade fan with salt-air-resistant finishes is the right call, not a standard outdoor model.
| Porch type | Recommended fan rating | Blade span range |
|---|---|---|
| Fully covered, screened porch | Damp-rated | 44 to 52 inches |
| Covered patio or pergola with roof | Damp-rated | 52 to 60 inches |
| Open pergola or exposed deck | Wet-rated | 52 to 72 inches |
| Coastal or high-humidity location | Coastal-grade wet-rated | 52 to 60 inches |
Pro Tip: Check the UL listing label on the fan box before purchasing. A fan labeled “damp location” only is not approved for any space where rain can reach the blades or motor, even indirectly.
What are the structural and mounting requirements for porch fan installation?
The most common cause of outdoor fan failure is not the motor. Improper mechanical support is the leading culprit, producing wobble, noise, and eventual motor damage. Before you touch a wire or blade, inspect your ceiling structure. On a wood-framed covered porch, locate the joists using a stud finder and mark their centers. On an aluminum patio cover, never mount directly to the metal sheeting. Always secure support brackets to the underlying joists with pilot holes and appropriate fasteners to prevent splitting and vibration.
The electrical box is the single most critical hardware component in the whole project. Fan-rated electrical boxes must attach directly to structural framing with rigid braces designed to handle the torque and weight of a spinning fan. Standard light fixture boxes are not rated for fan loads and will fail over time. At hardware stores, look for boxes labeled “fan-rated” or “fan-brace,” which are specifically designed to handle the dynamic load a ceiling fan creates.
Clearance requirements protect both safety and airflow performance. Minimum clearances call for at least 7 feet from the floor to the blade tips and 18 to 24 inches between the blades and the ceiling or beam above. These numbers are not suggestions. They reflect tested airflow efficiency and head-clearance safety. On a standard 8-foot porch ceiling, a flush-mount or low-profile fan is often the only option that meets both requirements.
Key mounting hardware to have on hand before you start:
- Fan-rated electrical box with brace rated for at least 35 pounds
- Lag screws or structural screws sized for your joist material
- Downrod in the correct length for your ceiling height
- Canopy cover that seals the ceiling opening against moisture
- Locking washers to prevent blade bracket screws from vibrating loose
Pro Tip: If your porch ceiling is a single layer of tongue-and-groove wood with no accessible joists above, install a fan brace kit that expands between two joists from below. These kits require no attic access and hold fans up to 70 pounds.
How to safely wire and power an outdoor porch ceiling fan
Electrical safety for outdoor fan wiring follows a different standard than indoor work, and skipping any step creates real risk. Follow this sequence every time:
- Turn off the circuit breaker for the porch area and use a non-contact voltage tester to confirm the wires at the box are dead before touching anything. Never rely on a light switch alone to de-energize a circuit.
- Verify GFCI protection. All outdoor electrical circuits must be protected by a ground fault circuit interrupter. If your porch outlet or circuit is not GFCI-protected, install a GFCI breaker or outlet before proceeding. This is a code requirement in most U.S. jurisdictions, not optional.
- Use outdoor-rated wiring throughout. Weatherproof wiring and sealed connectors prevent corrosion and electrical hazards in moisture-prone environments. Standard indoor wire nuts corrode outdoors. Use weatherproof wire connectors rated for wet locations.
- Install an outdoor-rated junction box. The box must carry a wet or damp location rating that matches your fan’s rating. Seal any gaps around the conduit entry with weatherproof caulk or a foam gasket.
- Connect wires in the correct order. Match black to black (hot), white to white (neutral), and green or bare copper to the ground wire on the fan. If your fan has a separate blue wire for a light kit, connect it to the second hot wire if a separate switch controls the light, or cap it if not.
- Test before final assembly. Restore power briefly with just the wiring connected and no fan body attached. Confirm the circuit works, then cut power again before attaching the motor housing.
If your porch has no existing wiring at the ceiling location, running a new circuit is a job for a licensed electrician. Pulling wire through finished porch ceilings and connecting to your panel involves permit requirements and code compliance that vary by state. A professional ceiling fan installation service handles this efficiently and ensures the work passes inspection.
What are the best practices for assembling and balancing your porch fan?
Assembly done in the right order saves you from taking the fan down twice. Lay out all hardware on a clean surface before you start and match each bag of screws to its step in the instruction manual. Most outdoor fan wobble problems trace back to one loose blade bracket screw, not a defective motor.
- Attach the mounting bracket to the electrical box and thread the downrod through the canopy. Route the wiring through the downrod before attaching it to the motor housing, since you cannot thread wire through after the fact.
- Hang the motor housing on the mounting bracket and complete the wire connections as described in the wiring section above. Tuck wires neatly into the canopy so they do not contact moving parts.
- Attach blade irons to the motor housing first, then attach blades to the irons. Tighten each screw firmly but do not overtorque, which can crack plastic blade irons. Use locking washers on every blade bracket screw.
- Power on and test for wobble. Run the fan at all three speeds. Minor wobble at high speed is normal during the first few minutes as the blades settle. Persistent wobble means one blade iron is slightly bent or one screw is loose.
For balancing, most fans ship with a plastic balancing kit containing small clip weights. Attach a clip to the leading edge of one blade at the midpoint and run the fan. Move the clip blade by blade until wobble reduces, then use the adhesive weight to make the fix permanent. This process takes about 10 minutes and eliminates noise that would otherwise worsen over time.
Routine maintenance extends fan life significantly on outdoor installations. Clean blades monthly with a damp cloth to remove pollen and debris, which adds uneven weight. Tighten all visible screws at the start of each season. If the motor housing has oil ports, add a few drops of non-detergent motor oil annually.
Remote controls simplify speed and light adjustments from anywhere on the porch, which matters especially when the fan is mounted at height on a pergola or vaulted porch ceiling. Consider this feature a practical necessity, not a luxury.
Key takeaways
Successful ceiling fan outdoor porch installation requires matching the fan’s moisture rating to the porch exposure, securing the mount to structural framing with a fan-rated box, and completing all wiring with outdoor-rated, GFCI-protected components.
| Point | Details |
|---|---|
| Match the rating to exposure | Use damp-rated fans for covered porches and wet-rated fans for open or pergola installations. |
| Size the fan to the space | A 44 to 52-inch fan covers most standard covered porches between 150 and 300 square feet. |
| Use a fan-rated electrical box | Standard light fixture boxes cannot handle fan torque and will fail, causing wobble and safety issues. |
| Wire with outdoor-rated materials | GFCI protection and weatherproof connectors are code requirements, not optional upgrades. |
| Balance blades before finishing | Use the included balancing kit to eliminate wobble at high speed before considering the job complete. |
What I have learned from years of watching porch fan installs go wrong
The single most skipped step in any outdoor fan project is the framing inspection. Homeowners pick the fan, buy the hardware, and start drilling without confirming what is actually above the ceiling. On older covered porches, the framing may be undersized, spaced irregularly, or partially rotted near the fascia. Installing a fan-rated brace into compromised wood gives you false confidence. The brace is only as strong as what it grips.
The second mistake I see constantly is treating the moisture rating as a rough guideline rather than a hard limit. A damp-rated fan on a pergola that gets afternoon rain will show motor corrosion within one season. The damage is not covered under warranty because the installation was out of spec from day one. Wet-rated fans cost more, but they are the only correct answer for any space where rain reaches the fan.
On the positive side, the features that make the biggest real-world difference are remote controls and integrated LED lighting. A 52-inch outdoor fan with a remote and a dimmable LED kit turns a basic porch into a genuinely usable evening space. You do not have to walk to a wall switch in the dark or climb a ladder to change a bulb. These are small things that compound into daily quality of life.
Take your time on the blade attachment step. I have seen experienced DIYers rush through it and end up with a fan that vibrates at every speed. Slow down, use locking washers, and torque each screw evenly. The 20 minutes you spend getting it right the first time saves you an hour of troubleshooting later.
— Eli
Find the right outdoor fan for your porch at Wynwoodfans
Choosing the right fan is half the battle, and Wynwoodfans makes the selection straightforward with a lineup built specifically for outdoor performance.

The 52" Yonas Coastal Grade fan is designed for porches in humid or salt-air environments, with finishes that resist corrosion where standard outdoor fans fail within a season. For larger covered spaces, the 72-inch Torrent damp-rated fan in matte black moves serious air volume across open porch areas up to 400 square feet. Every model ships with detailed installation specs, blade span guidance, and motor ratings so you can match the fan to your exact porch before it arrives. Browse the full outdoor collection at Wynwoodfans to find the right fit for your space, style, and climate.
FAQ
What is the difference between damp-rated and wet-rated outdoor fans?
Damp-rated fans are approved for covered areas without direct rain contact, such as screened or roofed porches. Wet-rated fans are fully sealed for direct exposure to rain and are required for open pergolas, uncovered decks, and exposed patios.
How high does a porch ceiling need to be for a ceiling fan?
The blade tips must clear at least 7 feet from the floor, with 18 to 24 inches of clearance between the blades and the ceiling above. On an 8-foot porch ceiling, a flush-mount or low-profile fan is typically the only option that meets both requirements.
Can I install an outdoor ceiling fan without existing wiring?
You can install the fan itself, but running a new circuit from your electrical panel to the porch ceiling requires a licensed electrician in most jurisdictions. Permit requirements and code compliance vary by state, so check local rules before starting.
Do outdoor ceiling fans need to be on a GFCI circuit?
Yes. All outdoor electrical circuits, including those powering ceiling fans, must be protected by a GFCI breaker or outlet under the National Electrical Code. This requirement applies to both new installations and replacements.
How do I stop my outdoor ceiling fan from wobbling?
Wobble is almost always caused by a loose blade bracket screw or a slightly bent blade iron. Tighten all blade screws first, then use the balancing clip kit included with the fan to identify and correct any remaining imbalance by moving the clip blade by blade at the midpoint.